Feb 24, 2013

Banjo Boys, Chapter 12

Once again, Banjo Boy Central was blessed with perfect weather on a Saturday.  Monty and I met for breakfast at Hardee's in Meridianville.  Unfortunately, Clint could not join us today, so it was a two-man Banjo Boy day.
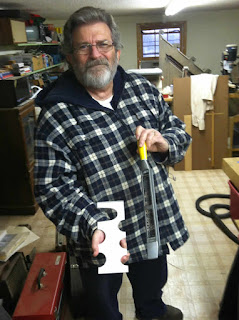
Monty at the drill press,
polishing his brackets

As soon as we got to the shop, Monty began polishing the brass brackets that he had fabricated last weekend.  This involved holding them with the small threaded handle that he made and pressing them against a cloth polishing wheel mounted in the drill press.  He continuously applies a wax impregnated polishing compound and rotates the individual brackets to get all sides shiny.  It was tedious work, but the results, shown below, were spectacular!
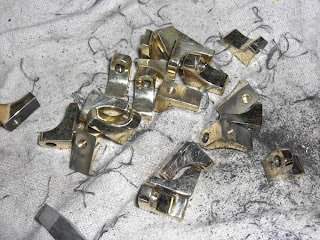


The finished brackets


As Monty was polishing, I was upstairs reshaping my neck (again).  I felt that the neck was too "broad shouldered" especially at the narrowest point below the peg head.  So I attacked it with a course wood rasp and rounded it substantially.  Of course that required that I resand it and progress from 80 grit sandpaper down to 400 grit.  I also had to re-stain the neck and blend the stain in with the remaining stain where I hadn't reshaped it.

A few weeks ago, I had seen a close up photo of a feature on a Romero banjo that I really liked.  It was a sculptured relief around the section of the neck where it widens to accommodate the 5th string.  So I took some small chisels in hand and duplicated it to the best of my non-woodcarver ability.  Here's the result.  I'm very pleased with the outcome.
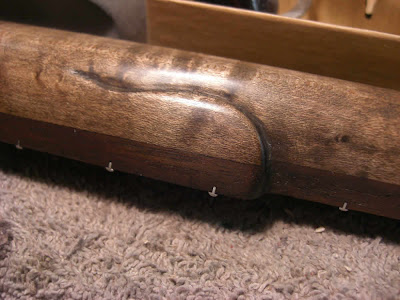
The relieved area around the 5th string
Then came the moment of truth.  It was time to set up our alignment jig and drill the hole in the heel of the neck that will ultimately accommodate the dowel rod and attach the neck to the rim of the banjo.  The alignment and position of this hole is critical to the position of all the pieces -- strings, frets, bridge.  It is the one structural detail that drives all others.

The technique we planned to use deserves some explanation.  We would first set up the jig to hold the neck in correct alignment with the "pot."  Then we would carefully determine the centerline of the rim and mark the point on the tailpiece end of the rim where the dowel rod will terminate.  Using an 18" long drill bit, we will drill all the way through from the tailpiece attachment point, through the opposite side of the pot, and 1-1/2 inches into the heel of the neck.  Here's a sketch:


The drilling setup
After the "pilot hole" is drilled, we remove the drill bit and insert a steel rod the same size as the pilot hole.  On this steel rod, we attach a "hollow core counterbore" that looks like this:

The bit now drills a 5/8" hole through the neck-attaching side of the rim and into the heel of the neck.  Of course our dowel rods have a 5/8" dowel end that will eventually be glued into this hole.


That's the plan.

A Banjo Boy dilemma...
All went well until we tried to drill through the pot with the counterbore.  Try as we might, the cutter barely made an impression.  It turns out that it is a wood cutting counterbore, not intended nor designed to cut metal.  So I am at the point of having the pilot hole drilled into my neck with no place to go.

This is a real challenge for the Banjo Boys.  Tune in next week.

Feb 22, 2013

A Very Special Gift for a Very Special Lady on a Very Special Occasion...


January 5, 2013, passed without much fanfare but it was an occasion for much celebration.  On that day, Mary Ann celebrated 25 years of drug-free and alcohol-free living.  To those of us who have experienced addiction first hand, this is indeed a time for prayerful thanksgiving.  There's a popular saying that one hears in the meeting places of Alcoholics Anonymous: "If you don't believe in miracles, stick around and you'll be one."  I live with this miracle.

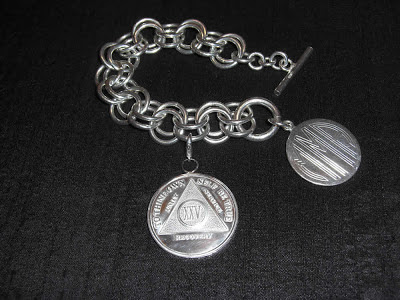
To honor Mary Ann's special day, I had ordered a particular sterling silver medallion on which is inscribed the AA principles of Unity, Recovery, and Service.  It also has the Roman numerals XXV, signifying her years of sobriety.  On the obverse of the medallion is the beginning of serenity prayer, often associated with recovery, "God grant me the serenity to accept the things I cannot change; courage to change the things I can; and wisdom to know the difference."  The prayer by Reinhold Niebuhr continues, "
Living one day at a time; Enjoying one moment at a time; Accepting hardships as the pathway to peace; Taking, as He did, this sinful world as it is, not as I would have it; Trusting that He will make all things right if I surrender to His Will; That I may be reasonably happy in this life and supremely happy with Him Forever in the next.  Amen."

I also purchased a bracelet on which she could mount the medallion if she wished.  As it turned out, Mary Ann had another bracelet that she thought would look best.  We got a few extra links put in and had the medallion mounted.  It looks great:

Mary Ann's  bracelet with the new medallion
(Click on image to enlarge)

Feb 17, 2013

"Discovering the Civil War" -- A trip to Nashville

Today, Mary Ann and I saw the original Emancipation Proclamation.  It was part of a traveling exhibition from the National Archives.  It is currently (and for a very limited engagement) at the Tennessee State Museum in Nashville.  We had gotten tickets in advance, courtesy of Mary Ann's on line research and initiative.  We arrived at the museum about fifteen minutes before our scheduled 1:30 viewing time.  The processing was efficient and in no time we were in line to see the document, faded and handwritten, but so incredibly important to the history of our nation.  The most remarkable words appear on the third page: "And by virtue of the power, and for the purpose aforesaid, I do order and declare that all persons held as slaves within said designated States, and parts of States, are, and henceforward shall be free; and that the Executive government of the United States, including the military and naval authorities thereof, will recognize and maintain the freedom of said persons."
The record of the 13th amendment

Just beyond the Proclamation, also under thick, protective glass, was the handwritten Congressional Record of December 6, 1865, which outlawed slavery and involuntary servitude, except as punishment for a crime.  I was able to take a picture of that ledger.


The rest of the exhibit was made up of other archival documents from both sides -- military papers, newspapers, letters, and legal documents.  There were several interactive exhibits as well.

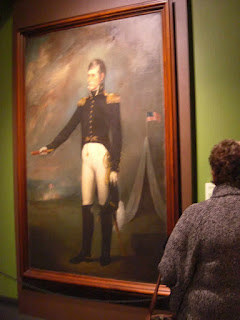
Mary Ann studies a portrait of Andrew Jackson

After we completed the Civil War exhibit (which will be at the museum through September 2), we walked into part of the museum's permanent collection.  It's very impressive, extremely well presented, and well worth the trip to Nashville.


We'll be back...

Banjo Boys, Chapter 10

Clint and Dan Shady at our first Boy's Joint Breakfast
Dan demonstrates how to bend
the tension hoop
This morning, we had the first ever Gathering of the Banjo Boys and the Shady Boys (GBBSB).  Monty, Clint and I needed to bend the brass material that forms our tension hoops.  Dan Shady had offered to help us with this since he owns a slip roller, the tool we needed to use.  The other day when I was out at Dan's shop, I invited him to join us at Gibson's Barbecue for Saturday breakfast and asked Deron if he and Daniel could join us.  So this morning at 9:00 we met for breakfast.  Then we proceeded to Dan's place for the bending of the hoops.  

Dan's slip roller takes a straight length of brass bar stock (which Clint had found online) and bends it into a nearly perfect circle.  We need these hoops to put tension on the skin or plastic heads that will stretch across our Dynaflow banjo rims or "pots."  The rollers made short order of making these circles.  Our next step will be to tweak them using a soft mallet and a round anvil to make them into precise 11-5/8" circles and to cut off the excess length.  Then Dan will silver-solder the ends together to form the continuous hoop that we need.
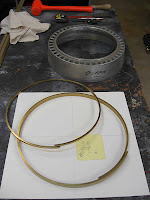
The formed brass hoops

We proceeded to my shop where we continued our progress.  Monty had decided to make a second dowel rod from the scrap piece of maple that remained when he cut out the back profile of his neck.  He carefully measured and marked the outline and cut the blank out using the bandsaw.  Then he mounted the maple blank in the ShopSmith.  We had trouble getting the lathe function of my ShopSmith to work correctly, so we tried to print a downloaded version of the ShopSmith Mark V manual.  But then my printer decided it didn't want to print that document.  Rather than ruin his very nice piece of maple, he decided to wait until we figure out how to properly turn it using the ShopSmith. (Note: On Sunday morning, I was able to print the User's Manual.)

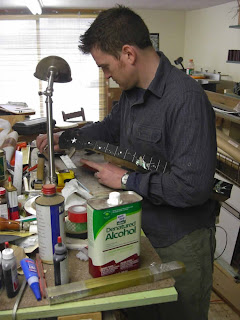
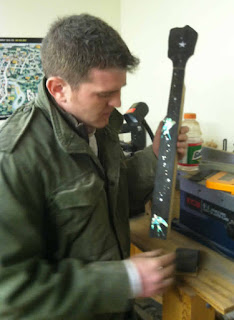
In the meantime, Clint was shaping and finishing the peghead on his neck.  It was very time consuming because of its intricacy and he took his time to avoid any mistakes.  I failed to get a picture of the finished product, but take my word for it, it looks terrific.  While this was going on, I was completing the shaping, sanding, and staining of the back side of my neck.  I used the tobacco brown dye that we had purchased, and I diluted it with denatured alcohol.  This allowed me to use it repeatedly until I got exactly the tone I was looking for.  I discovered that I had missed a couple small areas that I will have to sand further to get some scratch marks out of the wood.  Overall, however, I'm pleased with the results.
The sanded and stained neck
We had a special catered lunch today.  Mary Ann prepared a lovely platter of crackers and cheeses and a variety of cold cuts.  And we were even careful to keep the sawdust out of it.  Thanks, Honey.

Clint works on his peghead

Mary Ann and I are going to Nashville today to visit the Tennessee State Museum.  I plan to stop in Franklin to visit the Woodcraft Store and pick up some bandsaw blades.  If I'm successful, we may all get together tomorrow (Presedents' Day) for a little more banjo building.  Who knows?  We may even learn how to use the ShopSmith!

Feb 15, 2013

Thoughtful Treat...


Mary Ann spent yesterday baking cookies and patiently decorating them.  She wanted to do "something nice" for the ladies who staff the Costco Pharmacy in Huntsville.


Feb 12, 2013

Valentine's Day...


The Rose Fairy showed up today with something for Mary Ann.

Feb 10, 2013

Banjo Boys, Chapter 9...

Aligning the neck to the rim (We think!)
Once again, God must have wanted the Banjo Boys to congregate and make progress.  As the Northeast is digging out of 2 feet of snow, we basked in sunny, cloudless, 62-degree weather.  Monty arrived at around 9:30 AM and Clint wasn't far behind.  I had already moved Winston out of the shop and shifted the table saw and 6" belt sander to their outdoor locale.  We were ready to pursue the perfect Dynaflow banjo!
The dowel rod in a vintage Vega banjo

Monty needed to start on his "dowel rod," a piece of wood that is fastened to the heel of the neck, extends through a hole in the rim and is attached firmly to the opposite side of the rim.  We had originally talked about using the scrap of wood remaining from where we cut out the underside of the neck.  In fact, I had already marked mine with the outline of a square-cross-sectioned dowel rod.  I intended to turn one end on the lathe to produce a 5/8" round dowel that will be anchored into a hole at the base of the neck.

Monty turning his dowel rod

Monty, however, had decided that he wanted to use a round, rather than a square, dowel rod.  I looked around the shop and came up with a section of 1" diameter dowel.  We chucked it up on the lathe (an old Shopsmith that was a gift) and Monty created the reduced-diameter portion that was needed.


As this was going on, Clint was focused on making the piece that will form a black veneer for the underside of his peghead and completing the installation of the remaining frets that he had started last weekend.  He had brought Zoe, Sarah's Tibetan Terrier, so he and Zoe were upstairs working together.


Next, Monty and I started creating the jig that is needed to hold all the components together to align and double check how the pieces fit.  It turns out that the geometry of the banjo is far from simple.  And there are widely varying opinions of what is "right" with regard to the specifics.  Google "banjo neck angle" some time.  You'll be amazed at how many "right" ways there are to align the neck with the rim.  The angle between the two segments should be 1.4°, 3°, 3.5°, 4°, or 4.5°, depending on which web site you believe.  Regardless of which design you choose, it is important to get everything properly aligned before you start drilling the holes that define how and where the pieces are fastened together.

The alignment jig in operation

After a few minutes of "creative cogitating," Monty and I came up with a very simple system.  We cut a 15" x 40" piece of 3/4" plywood as the base for our jig.  We then built a "platform" onto which we can rigidly mount the rim.  We even thought to put a center line and concentric circle to position the rim.  The only variables remaining are the elevation and angle (slope?) of the neck.  We adjust both using combinations of shims placed beneath the heel and peghead areas.  It seems to work.


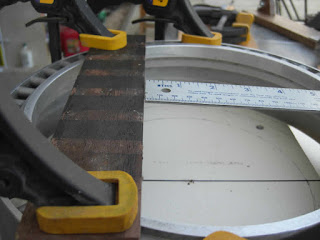
We set up my neck in the jig.  One alignment method says to use a straightedge placed on the fret surface and extend that line out to the position of the bridge, where it should be 3/8" above the head.  Using that system, it was obvious that my heel angle was pretty far off.  So we got out the jig we built earlier for cutting the neck angle at the heel and we re-cut my neck.  Fortunately, it appears to have come out perfectly.

This enabled me to start shaping the back of my neck.  I used the belt sander and various wood rasps to get the rough shape.  Then I began sanding, using automotive block sanders that Monty loaned us.  He used these on his neck, and they really work well at removing wood and avoiding high and low spots.  I still have quite a way to go on my neck.


Clint and Monty enjoy the weather and the Barbeque
So our status is as follows: Monty is about ready to start assembly after we check out/re-cut his heel; Clint will probably be ready to cut out his peghead shape and back profile; and I will continue shaping my neck and begin fabricating my dowel rod.

Banjo Boy lunch today was at Whitt's Barbeque in Fayetteville.  It was a "three thumbs up" lunch.  Whitt's may become the official Banjo Boy lunch hangout.


'Til next time...

Feb 2, 2013

Banjo Boys, Chapter 8


Clint and the neck with the beautiful bird inlays
Have we really been at this for 8 weeks?!?  It hardly seems possible.  When I came in today after one of our longest B-B days, Mary Ann admired the progress on my banjo neck and then asked, "Did you think it would take this long?"  I said that I knew that a banjo was a pretty complicated instrument and that I am not surprised at the time it takes.  We have made it even more complicated by choosing to build an instrument around a transmission part that was never intended to become a banjo.  We also chose to do some custom pearl inlay, which is very tedious.  All-in-all, I'm pleased at our progress.

Monty's "Green Monster"
Today started out with snow!  Monty arrived right on time driving his "Green Monster," a 1950 Chevrolet sedan-delivery.  Clint was delayed because several bridges in Huntsville had been closed due to ice buildup. Once he arrived, we started a very productive day.

Clint had worked at home this week to complete the embedding of his second mother-of-pearl barn swallow, so his neck inlay is nearly complete.  He inlayed this bird in the recessed section of the neck below the ogee that we routed last week.  It looks great.


Dressing up the finished frets
and sanding the peghead
After a short class on fret installation, Monty began embedding his frets into his fret board.  This involves cleaning up each fret slot using the fret saw (the slots get filled up with sawdust and other debris).  Then the fret material is cut just a little longer than the width of the neck at that location, and the fret is then driven into the clean slot using a special lead-loaded plastic mallet so as not to mar the wood adjacent to the fret.  After all the frets are installed, the ends have to be filed down and dressed so they don't have any sharp edges.
Ebony on the back of a
Romero banjo peghead

While Monty was installing frets, Clint was experimenting with some ebony veneer that he had purchased.  He wants to add ebony veneer to the underside of his peghead just as it is veneered on the top surface.  The problem arises because the underside has a curve at one end where it meets the "thumbstop," a small crest in the shape of the neck.  Clint tried using a heated bending iron that I use to bend dulcimer sides to bend his ebony.  Unfortunately, the experiment failed.  The wood is so dense and brittle that it splits, even when aided by heat and steam.  We think the solution may be to dye some poplar black and use it as faux ebony.


I had discovered that when I stood my neck up on the end that we machined last weekend, it leaned to one side by a couple of degrees.  That indicated that my circular cut was off-center relative to the center line of the neck.  So while Clint and Monty were "doing their thing," I set up the same rig we used last week and I reshaped the base of my neck.  While I was at it, I machined the notch that accommodates the tension hoop where it crosses the neck.


Later in the day, Clint and I got the sides of our necks cut to shape, and I got my frets installed.  Monty is now in the stage of shaping the back of his neck and will be using Surform rasps and checking his work using a cross-section template that we found on the Internet, printed, and glued to a piece of plexiglass.  We then cut the plexiglass to use as a gauge to check our neck shape.


Monty with the surform tool and shape template

These are starting to look like banjo necks!
My neck and Monty's with frets installed